
The Chromium Updater, also known as Omaha 4, is the technology behind automatic updates in Chrome and other Chromium-based browsers such as Edge. This tutorial gives you a high-level overview of how it works. We will use a simple example application and a real update server to show how you can use the Chromium Updater to update your own software.
Google has been maintaining separate technologies for updating Chrome on the various operating systems. On Windows, they use Omaha 3. On macOS, they used the Keystone framework. And on Linux, they used package managers such as apt. Omaha 4 is an effort to unify these technologies into a single, cross-platform codebase. Because its main purpose is to update Chrome, it lives in the Chromium source code repository and is also called the "Chromium Updater". But it can be used to update any application.
As of this writing in July 2026, Google have fully switched to Omaha 4 on macOS and Windows. This article focuses on Omaha 4 on macOS. If you are interested in Windows, you can either adapt the instructions here, or check out this Omaha 3 tutorial. As the name of this technology implies, its design is very similar to Omaha 4.
The Chromium Updater runs as a separate application on the user's computer. It checks for and installs updates
in the background every five hours. Additionally, it supports on-demand update checks. For example, you can open
chrome://settings/help in Chrome to check for updates manually:
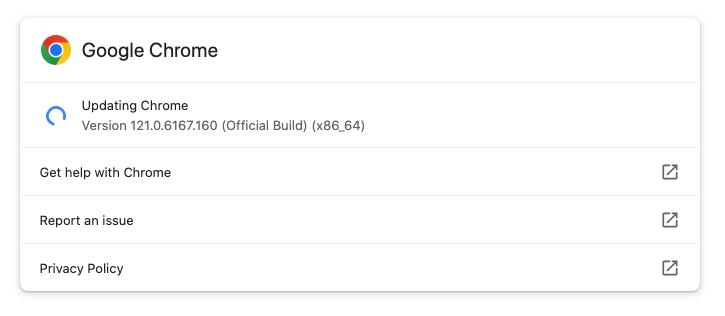
Running as a separate application has many advantages. First, the Chromium Updater can also apply updates when the browser is not running. Second, it can run with elevated privileges, which is necessary to update system-wide applications. Third, it can update multiple applications such as Chrome and Google Earth. And finally, it can recover broken application installations. For example, if Chrome were so broken that it could not start, the Chromium Updater could still run and repair it.
However, when the Chromium Updater runs as a separate application, how does it know which applications to
update? The answer is that each application that wants to be updated needs to register itself with the updater.
It is done via a configuration file on macOS. If you are curious, you can inspect the file for per-user
installations of Chrome at ~/Library/Application Support/Google/GoogleUpdater/prefs.json. It has an
entry similar to the following:
{"apps":{"com.google.chrome":{"pv":"123.0.6312.59" ...
This says that Chrome is installed at version 123.0.6312.59. Another application you will see listed is
{44fc7fe2-65ce-487c-93f4-edee46eeaaab}. This is the entry which the Chromium Updater uses to update
itself.
The background schedule of the updater for per-user installations is configured in
~/Library/LaunchAgents/com.google.GoogleUpdater.wake.plist. This can for example look as follows:
<key>ProgramArguments</key>
<array>
  <string>.../GoogleUpdater</string>
  <string>--wake-all</string>
  <string>--enable-logging</string>
  <string>--vmodule=*/components/update_client/*=2,*/chrome/updater/*=2</string>
</array>
<key>StartInterval</key>
<integer>3600</integer>
This file specifies the path to the updater binary and tells it to wake up every hour. If five hours have not
yet passed since the last run, then the updater simply exits. The file also enables logging. This is very useful
for debugging. You can find the log file for Google's updater in its installation directory, at
~/Library/Application Support/Google/GoogleUpdater/updater.log.
When the updater runs, it looks at the first configuration file we saw above to determine which applications are installed and at what versions. It then sends this information to the update server. If a new version is available, the server responds with the URL of an installer which can be used to update the application. The updater downloads and executes the installer, and the application is updated.
Note how the updater does not need to know anything about the applications it updates. It only needs to know where to find the configuration file and the update server. This makes it very easy to add new applications to the updater.
Installers can take different forms. On Windows, they can be .exes or .msis. On macOS, they can for example be .dmg files with a shell script called ".install" inside. For additional security, the installers must be encapsulated in .crx3 files. This is an archive format with a digital signature that can be used to verify that the installer comes from a trusted publisher (such as Google, or yourself).
Let's now see how you can use the Chromium Updater to update your own applications. The instructions here are for macOS. You can either adapt them for other operating systems, or follow the Omaha 3 tutorial for Windows.
Our example application is so simple that it is not even a real program. It's just a text file that shows the current version. Let's "install" it by executing the following commands in a terminal:
mkdir -p ~/SampleApp
echo "Hello from version 0.0.0.1" > ~/SampleApp/hello.txt
From now on, we can use the command cat ~/SampleApp/hello.txt to see the app's version. At the
moment, it shows:

Our goal is to turn this into version 0.0.0.2. If you have any questions or comments while following the coming steps, just use one of these buttons to send us a message:
You normally build the Chromium Updater from source. To make it easier for you to follow along, we have prepared a pre-built binary. To install it, please execute the following commands in a terminal:
curl -o ChromiumUpdater.tar.gz https://omaha-consulting.com/static/main/ChromiumUpdater.tar.gz
tar xzf ChromiumUpdater.tar.gz
ChromiumUpdater.app/Contents/MacOS/ChromiumUpdater --install 2>&1
We now need to register our application with the updater. To do so, we can execute the command below.
~/Library/Application\ Support/Chromium/ChromiumUpdater/Current/ChromiumUpdater.app/Contents/Helpers/ChromiumSoftwareUpdate.bundle/Contents/Helpers/ksadmin \
    -r -P com.omaha-consulting.SampleApp -v 0.0.0.1 -x ~/SampleApp -U
This says "register the application with ID com.omaha-consulting.SampleApp at version
0.0.0.1, installed in SampleApp in the home directory". The -U flag tells
the updater that the application is installed for your current user only, and not system-wide.
The rest of this article assumes that you have a Chromium update server. To obtain a free test server from us, please use the button below to send us a message. We will then send you the necessary credentials.
CUP stands for Client Update Protocol. It secures the communication between the updater and the server via a public / private key pair. The updater you downloaded and installed above has the public key built in. We now need to configure the corresponding private key on the server.
Please log into your server's admin interface and click on "CUP keys" on the left. Then, click on the button
that says "Add CUP key". Enter the number 1 as the identifier, and copy-paste the following as the
private key:
-----BEGIN EC PARAMETERS-----
BggqhkjOPQMBBw==
-----END EC PARAMETERS-----
-----BEGIN EC PRIVATE KEY-----
MHcCAQEEIKHGD1z/y7Le0qoVCaiLd7ukBAdjCybCqg483WyJgLtboAoGCCqGSM49
AwEHoUQDQgAEsFLUXMElcQBGvInjWR2xqKjqUPIeeiRrtoOAow2MB95oIjk9mAwz
7NTv0FZ9TKvITDPcpkujxceSi1X2nI6qjA==
-----END EC PRIVATE KEY-----
It should look as follows in the admin interface:
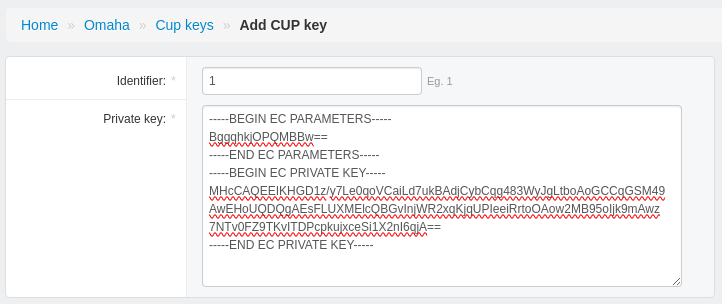
Click "Save" (not shown in the screenshot above) to create the CUP key.
When we upload a version to the update server, we need to tell it which operating system, CPU architecture and application the version is for. On a new update server, we first need to configure this similarly to the CUP key. Please create the following entries:
We will now create an installer for a new version of our application. The structure we need is as follows:
That is, we need a .crx3 file that contains a .dmg file, which in turn consists of a .install script and the application directory, SampleApp/. The updater extracts the .crx3, mounts the .dmg, and then executes .install, passing to it the path of the mounted volume and the app's installation directory.
Let's first make sure that we do not overwrite our "installed" application in ~/SampleApp. Create a
new working directory and cd into it:
mkdir SampleApp-dev
cd SampleApp-dev
Now, create a directory that will contain the contents of the .dmg file:
mkdir dmg-contents
Inside that folder, create the application directory and version 2 of the hello.txt file:
mkdir dmg-contents/SampleApp
echo "Hello from version 0.0.0.2" > dmg-contents/SampleApp/hello.txt
The install script we need looks as follows:
#!/bin/bash -e
rsync -r "$1/SampleApp/" "$2"
This will copy the new version of the application from the mounted DMG volume ("$1") into the installation
directory ("$2"). Save this script at dmg-contents/.install. Then, make it executable:
chmod +x dmg-contents/.install
Now, create the .dmg file:
hdiutil create SampleApp.dmg -ov -fs HFS+ -srcfolder dmg-contents
To create the .crx3 file, we need a tool called crx3_build_action from Chromium. You can download
a pre-built copy and make it executable with the following commands:
curl -o crx3_build_action https://omaha-consulting.com/static/main/crx3_build_action
chmod +x crx3_build_action
Furthermore, we need a private key for signing the CRX. The Chromium Updater would reject binaries that are not signed with this key. You can download a sample key with the following command:
curl -o crx-private-key.der https://omaha-consulting.com/static/main/crx-private-key.der
Now, to create the .crx3 file, we first need to create a .zip archive of its contents:
zip SampleApp.zip SampleApp.dmg
Then, we can finally create the .crx3 file as follows:
./crx3_build_action SampleApp.crx3 SampleApp.zip crx-private-key.der
We are now ready to upload the new version to the update server. Please log into the admin interface and click on "Versions" on the left. Click the green "Add version" button. Enter 0, 0, 0 and 2 as the major, minor, build and patch version numbers. Select the SampleApp as the application, macOS as the Platform and x86_64 (or arm64) as the Architecture. Then, upload the SampleApp.crx3 file and enter "SampleApp.dmg" in the Run field. Your screen should look as follows:
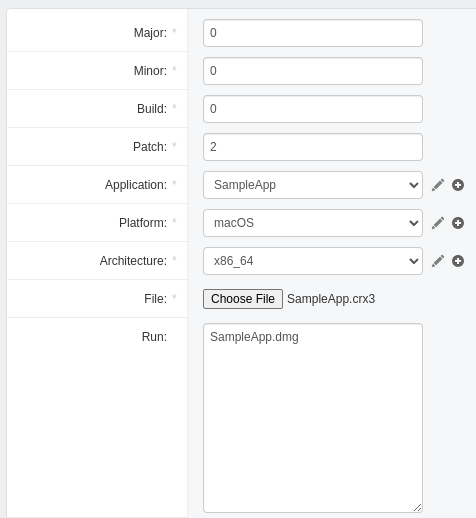
To upload the version, click the Save button (it is not shown in the screenshot above).
Now we can ask the Chromium Updater to check for an update to install the new version. To do this, first make
sure that the last_checked field in
~/Library/Application Support/Chromium/ChromiumUpdater/prefs.json does not appear at all or is set
to 0. For example, if it looks as follows:
{[...],"last_checked":"13355596183651106",[...]}
Then change it to:
{[...],"last_checked":"0",[...]}
Now you can trigger an update by executing the following command:
~/Library/Application\ Support/Chromium/ChromiumUpdater/Current/ChromiumUpdater.app/Contents/MacOS/ChromiumUpdater --wake-all
This command usually takes 2 - 3 minutes to complete. It is also normal for output to pause for a minute or so.
Eventually, it should terminate. You can then check the version of your application by executing
cat ~/SampleApp/hello.txt. It should now show:
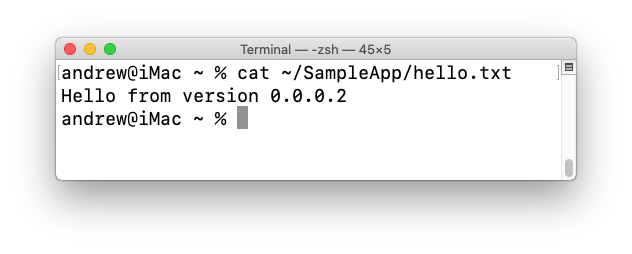
If it does, then congratulations! You have successfully updated your application using the Chromium Updater.
If you want to remove the Chromium Updater and the sample application you can execute the following commands:
rm -rf ~/SampleApp
~/Library/Application\ Support/Chromium/ChromiumUpdater/Current/ChromiumUpdater.app/Contents/MacOS/ChromiumUpdater --uninstall
The Chromium Updater, also known as Omaha 4, is a powerful, cross-platform tool for updating applications. We saw how it works and used an example to show how you can use it to update your own applications.
We hope you liked this tutorial. If you have any questions or comments, please send us a message via the button below.