
Google Omaha is the technology which implements Chrome's update mechanism. It is open source but difficult to set up. This tutorial gives an overview how it works. You will even learn how you can integrate Omaha to update your own applications.
This article is about Omaha version 3. It is written for Windows. If you are interested in Omaha on macOS, check out our Chromium Updater ("Omaha 4") Tutorial. The principles of the two versions are essentially the same.
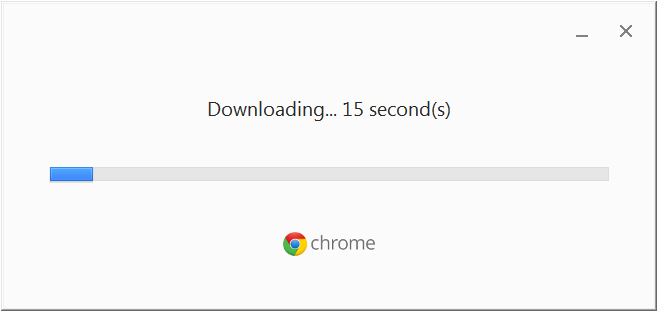
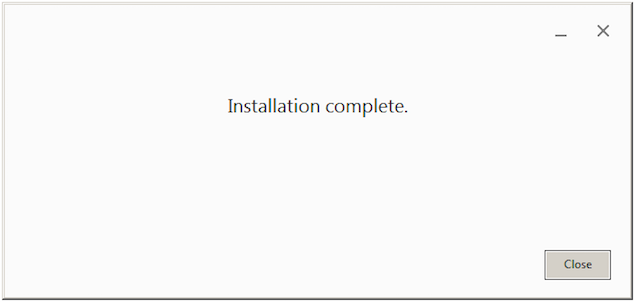
When you install Chrome, you are actually running a binary built with Omaha. This binary contacts Google's servers and asks "what's the latest version of Chrome?" The server responds with the URL of a .exe file that can be used to install Chrome. Omaha downloads this file and runs it. It also displays a simple GUI with progress information:
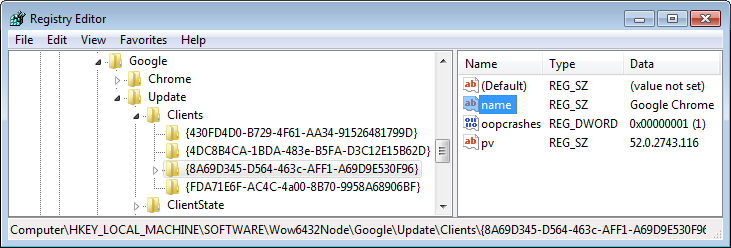
The .exe which was downloaded by Omaha installs Chrome into C:\Program Files (x86)\Google\Chrome . It also creates registry keys at HKLM\Software\Wow6432Node\Google\Update\Clients :
If you're wondering about Program Files ( x86 ) and Wow6432Node , that's because Omaha is still a 32-bit application, probably for maximum compatibility with existing systems.
The registry keys in the screenshot are a vital point of communication between Omaha and the applications it manages. Each application that wants to be kept up to date by Omaha needs to have a registry key under Software\Wow6432Node\Google\Update\Clients . Chrome is registered there under the globally constant id {8A69D345-D564-463c-AFF1-A69D9E530F96} . You can see in the screenshot that its version is 52.0.2743.116 . Another interesting id is {430FD4D0-...} . This is the key Omaha uses to update itself! ;-)
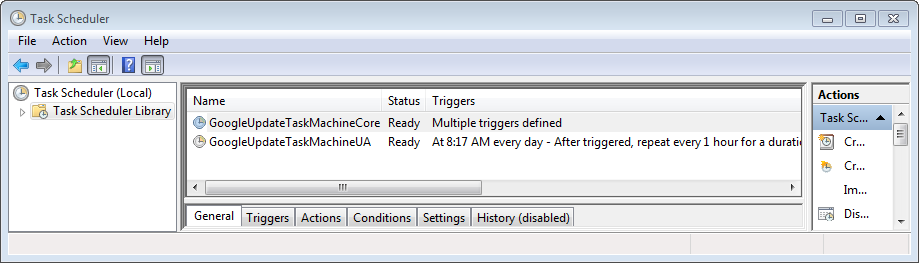
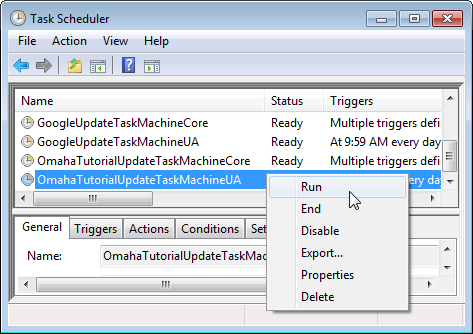
Omaha also sets up two tasks in the Windows Task Scheduler:
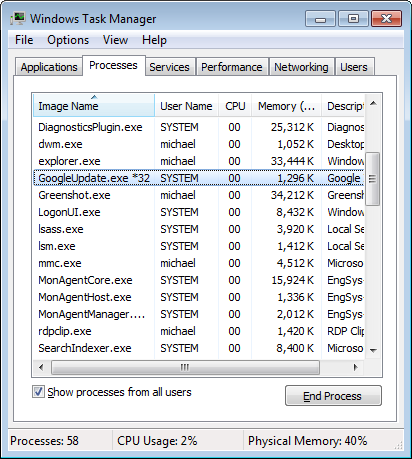
You sometimes see them as
GoogleUpdate.exe
in the Task Manager:
When the update tasks run, Omaha looks at the registry keys shown above to see which applications need to be
updated, and what versions they are at. It sends this information to the update server. If a new version is
available, the server responds with the URL of an .exe file which can be used to update the respective
application.
A nice feature of this binary-based approach is that Omaha and the update server are completely agnostic of the
applications they manage. The only thing the two components need are executables which perform the
application-specific update/installation steps.
Another important feature of Omaha is that it handles permission issues. For example, Chrome may be installed
with an administrator account, but then run under a normal user account without permissions to perform updates.
Omaha performs all update and installation tasks with the same privileges as the original installation. This for
instance allows a non-privileged user to "check for updates" in a system-wide installation.
The rest of the tutorial will now give you first-hand experience with using Omaha. You will create a very basic
application, upload it to an update server, then use Omaha to release a new version.
To continue, you need to be on a Windows computer with administrator privileges. Binaries are provided if you
want to follow along without doing any programming. Otherwise, you can use any programming language or
technology that lets you produce self-contained .exe or .msi files. We will use Go for this task.
You also need an update server. To get immediate access to a test server, please enter your email address below.
As explained above, Omaha always receives executable files in response to install/update requests. For instance,
the client says "
I would like to install app XYZ
" and the server answers "
You can do this with https://.../install.exe
". Likewise for updates: The client says "
I have version 1.0 of XYZ, is there an update?
" and the server responds "
Yes, there's 1.1. You can use https://.../update.exe to update.
"
We will now build the most basic installer.exe using Go. As you can see in the source code below, the installer
sets two registry values: "pv" defines the version of our application, in our example 0.0.1.0. And "name" sets
our application's name to "SampleApp".
package main

import "golang.org/x/sys/windows/registry"

func main() {
    const productId = `{9B01C5D1-7F78-4A4E-A89B-0415F6466BC7}`
    regKey := `SOFTWARE\OmahaTutorial\Update\Clients\` + productId
    k, _, err := registry.CreateKey(registry.LOCAL_MACHINE, regKey, registry.WRITE | registry.WOW64_32KEY)
    check(err)
    defer k.Close()
    check(k.SetStringValue("name", `SampleApp`))
    check(k.SetStringValue("pv", `0.0.1.0`))
}

func check(e error) {
    if e != nil {
        panic(e)
    }
}
When this code runs it sets the registry values at
HKLM\Software\Wow6432Node\OmahaTutorial\Update\Clients\{9B01...}
:
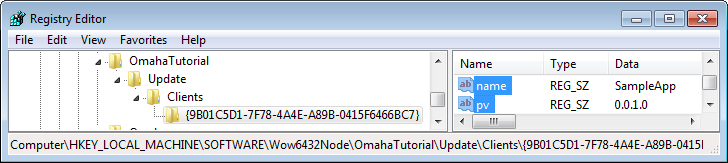
Compare this to Chrome's keys at the beginning of this tutorial: We now have
...\OmahaTutorial\Update\...
while Google's keys were at
...\Google\Update\...
. When you use Omaha for your own products, you will have
...\YourCompany\Update
. Finally, the last part of the registry path –
{9B01...}
– is a randomly selected id for our application.
You may wonder why we are setting these strange registry keys. The reason is that Omaha relies on us to set
them. If we don't, then Omaha believes that our application failed to install.
If you are following along with Go, then you can build the above code by saving it as install.go and executing the following commands:
go mod init main
go mod tidy
go build install.go
If you don't want to write or compile the code your self, you can use
this pre-compiled copy of install.exe
for the next step of the tutorial.
Log in to
/admin
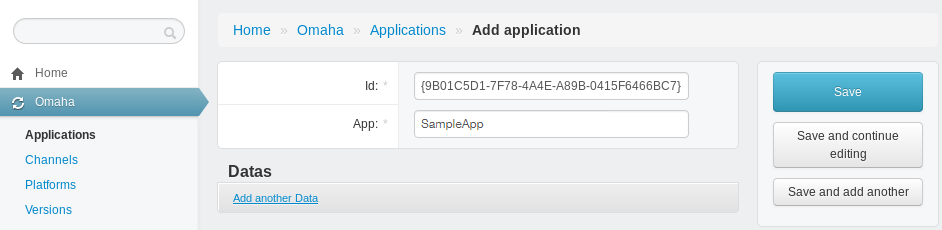
on your update server. Click on
Omaha/Applications
on the left-hand side. Add an application with
Id
the same value as the
productId
above and
name
the value from product. Important: Do include the curly braces
{}
in the id:
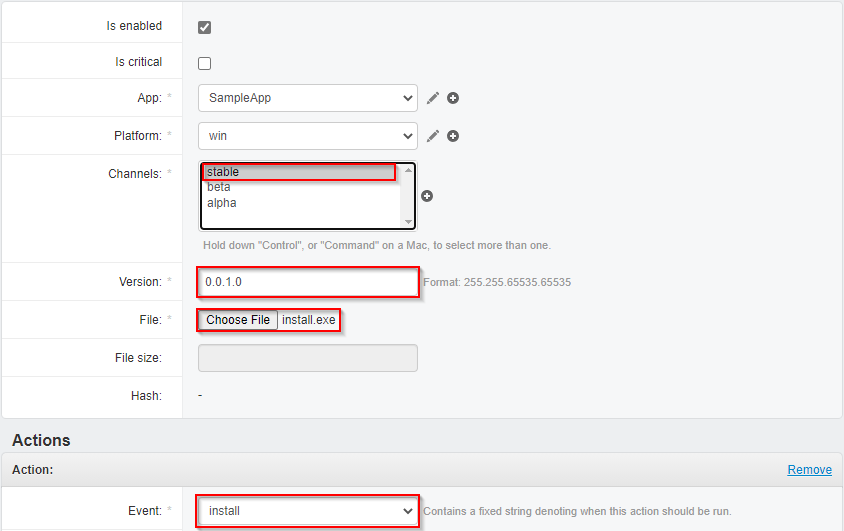
Click on Versions on the left. Add a version for your app, in the stable channel, with number the same as pv in the install script. Upload install.exe from the previous step as the file. Click "Add another Action" at the bottom. Select install as Event and leave the remaining fields empty. Click Save .
We can now use Omaha to install our sample application. Do you remember from above that our registry keys were at ...\OmahaTutorial\Update instead of ...\Google\Update? In your own projects, you will likely have ...\YourCompany\Update. But you will have further changes: In particular, you will use your own update server, not Google's, for distributing updates.
Omaha hard-codes values such as the update server URL and registry key names in its C++ implementation. To prevent you from having to dig into C++ for this tutorial, we will use a trick to make Omaha fetch updates from your server: Set the registry value HKLM\Software\Wow6432Node\OmahaTutorial\UpdateDev\url to your update server domain plus /service/update2 as in this screenshot:
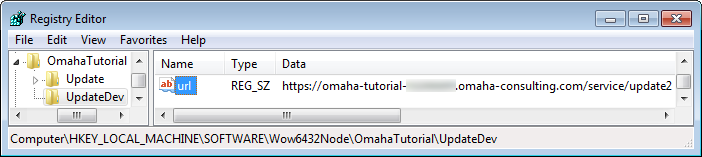
Omaha respects this key as an override for its hard-coded values.
Now delete the OmahaTutorial\Update registry key if you have it. It will be created when Omaha executes our install.exe from above.
To make Omaha install our application, download and run SampleAppSetup.exe . This is our equivalent of ChromeSetup.exe: It is an online installer built with Omaha that is configured to use registry keys in OmahaTutorial\Update and install the application with our id {9B...} from the server. If all went well, you should eventually see the following window:
You should now also have the OmahaTutorial\Update\Clients\{9B...} registry key. This proves that Omaha downloaded and executed our installer . If that is the case, then congratulations! You just installed your first application with Omaha. If not, please see the Troubleshooting section at the end.
To release a new version of our application, change the pv value in your installer's source code to 0.0.2.0 , then re-compile to get a new copy of install.exe . Log into the update server's admin interface, and create a new Version for your app. Ensure you use the new version number 0.0.2.0. Upload the newly generated install.exe . Click Add another Action at the bottom. This time however, select update as event. Finally, click Save .
By default, Omaha checks for updates every few hours in the background. To force an immediate update check, perform the following steps:
1. Open a command prompt as Administrator and type the following command:
taskkill /IM OmahaTutorialUpdate.exe /F
This shuts down all running instances of Omaha.
2. Delete the registry value HKLM\Software\Wow6432Node\OmahaTutorial\Update\LastChecked (if it exists).
3. Open the Windows Task Scheduler and run OmahaTutorialUpdateTaskMachineUA . Note how it appears next to Google's update tasks. Pretty cool, right? ;-)
The task executes at a very low priority, so can take several minutes to run. Keep refreshing in the Window Task Scheduler with F5 until the task state switches from Running back to Ready .
Once the task has finished running, check the version of your application in the registry at ...\OmahaTutorial\Update\Clients\{9B...}\pv . It should say 0.0.2.0 :
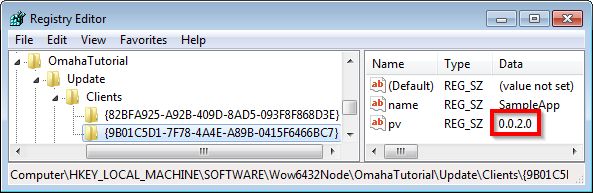
This proves that Omaha successfully applied your update by running the new copy of install.exe , which we uploaded to the server. If you see this value, then congratulations! You have completed this tutorial. If not, please see Troubleshooting below.
Omaha uninstalls itself when it sees that there are no more clients (besides itself) in the Update\Clients registry key. So to uninstall our copy, delete Update\Clients\{9B...} . Then force an update check per the instructions above. After few minutes, Omaha should have disappeared from your system.
You will now likely be keen to update an actual application of yours. Here are some pointers to get you started.
On the server side, you need an update server that speaks the Omaha protocol. We open sourced the old Python 2 version of our implementation, but it does not support current versions of Omaha. If you would like access to our Python 3 implementation with the latest patches, please get in touch . This version of the server is what you used above.
On the client side, using Omaha requires creating a fork of Google's C++ implementation . As described above, this is necessary to change the update server URL, but also the names of binaries and registry keys ("YourCompany Update" instead of "Google Update"). Engineers who work with Omaha for the first time often take weeks before obtaining a first runnable prototype. As an agency, one of the services we can provide is to fork Omaha for you. Because we do it all the time, we can do this more cost-effectively and at a higher quality than people new to the project.
In all cases, do feel free to get in touch with us with any questions regarding Omaha or other update technologies. We typically respond within one business day.
If the installation with Omaha was unsuccessful with message "Unable to connect to the Internet":

Then you may not have set the UpdateDev registry key correctly. Please go back over the instructions above and check all details.
For this, and any other problems with Omaha, it can be very useful to turn on logging. You can do this by creating the file C:\OmahaTutorialUpdate.ini with the following contents:
[LoggingLevel]
LC_CORE=5
LC_NET=4
LC_PLUGIN=3
LC_SERVICE=3
LC_SETUP=3
LC_SHELL=3
LC_UTIL=3
LC_OPT=3
LC_REPORT=3
[LoggingSettings]
EnableLogging=1
LogFilePath="C:\Omaha log.txt"
MaxLogFileSize=10000000
ShowTime=1
LogToFile=1
AppendToFile=1
LogToStdOut=0
LogToOutputDebug=1
[DebugSettings]
SkipServerReport=1
NoSendDumpToServer=1
NoSendStackToServer=1
This snippet is from Omaha's documentation . It works if you are running a debug build of Omaha. It produces c:\Omaha log.txt , which you can inspect for any glaring error messages. What may further be enlightening is to search for <request> / <response> in the log and compare this with the protocol specification . Of course, you can always also just get in touch with us for help: